How to create a task card
Before You Begin
To create a task card you need an active project open in Plan view. Task cards are added directly to a specific week on the project timeline, so first navigate to the week where you want the task to appear.
New tasks can be created in less than a minute.
Step-by-Step Instructions
Scroll to the Plan view and locate the target week
From the project Plan page, scroll down past the kanban board. You will see the full timeline organized into phases (e.g., Discovery & Empathy, Build & Test, Measure & Iterate, Buffer). Each phase contains numbered week rows.
Find the week you want to add a task to. The active week is labeled ACTIVE in blue.
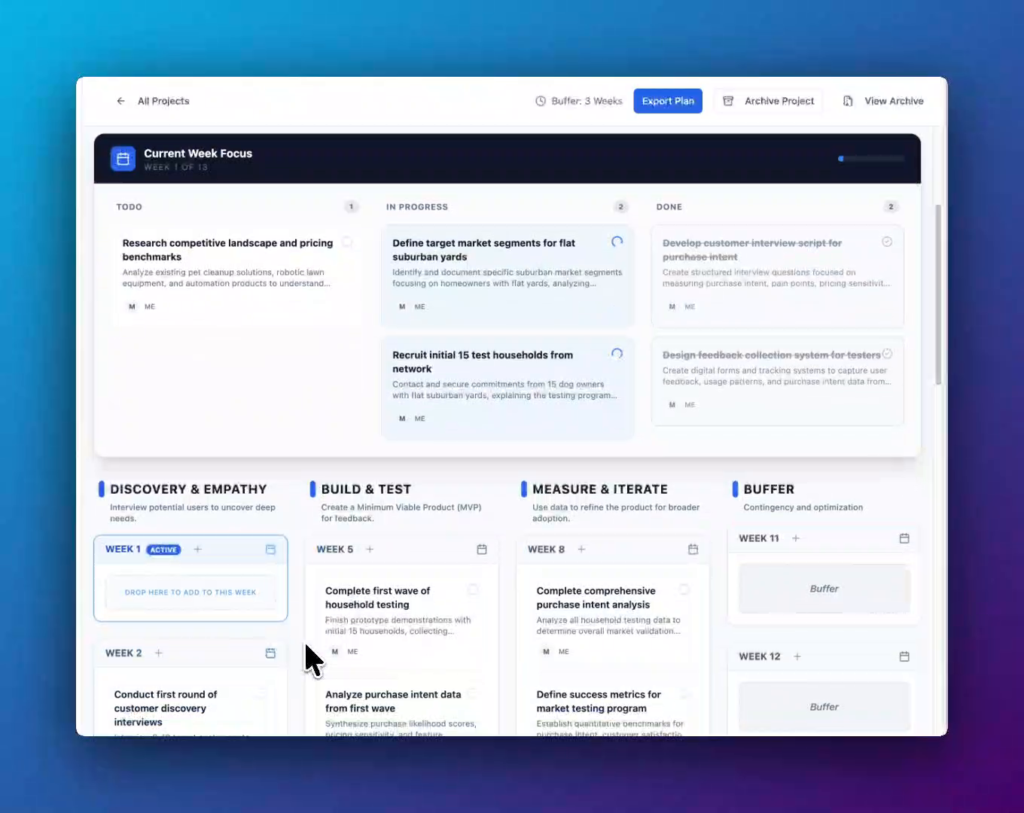
The Plan view. Week 1 is marked ACTIVE. Each week row has a + button to add a task.
Click the + button next to the week
Hover over the week row header (e.g., WEEK 1 ACTIVE). A + icon appears to the right of the week label. Click it to open the Add Task panel.
Tip
You can also drag an existing task card from another week and drop it into the “Drop here to add to this week” drop zone that appears inside the active week.
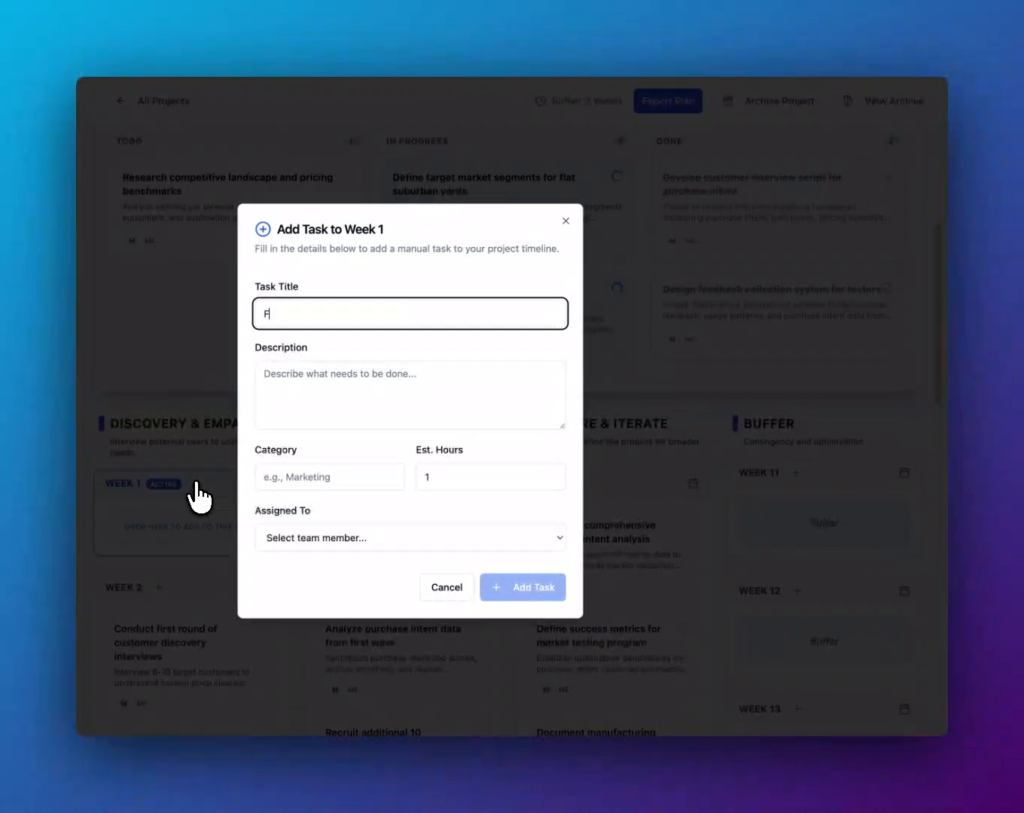
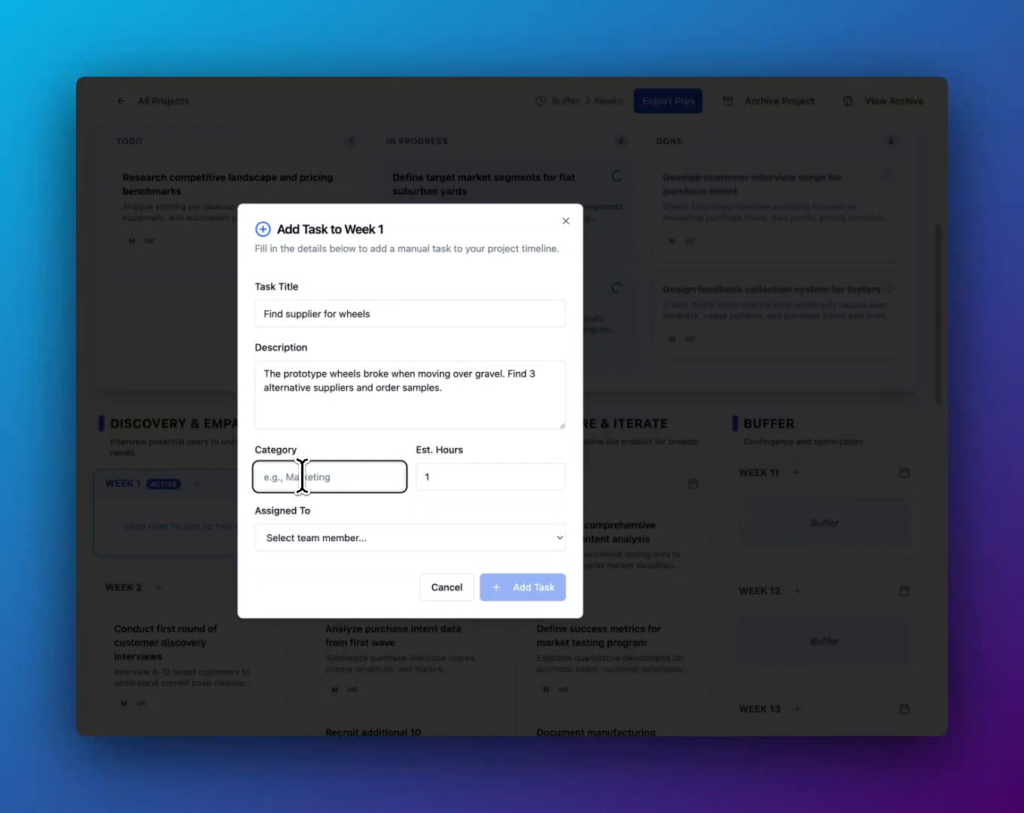
The Add Task to Week 1 modal opens with the Task Title field automatically focused.
Enter a task title
Type a clear, action-oriented title in the Task Title field. This is what teammates will see on the task card in the board and plan views. Keep it concise, ideally under 10 words.
Example: “Find supplier for wheels”
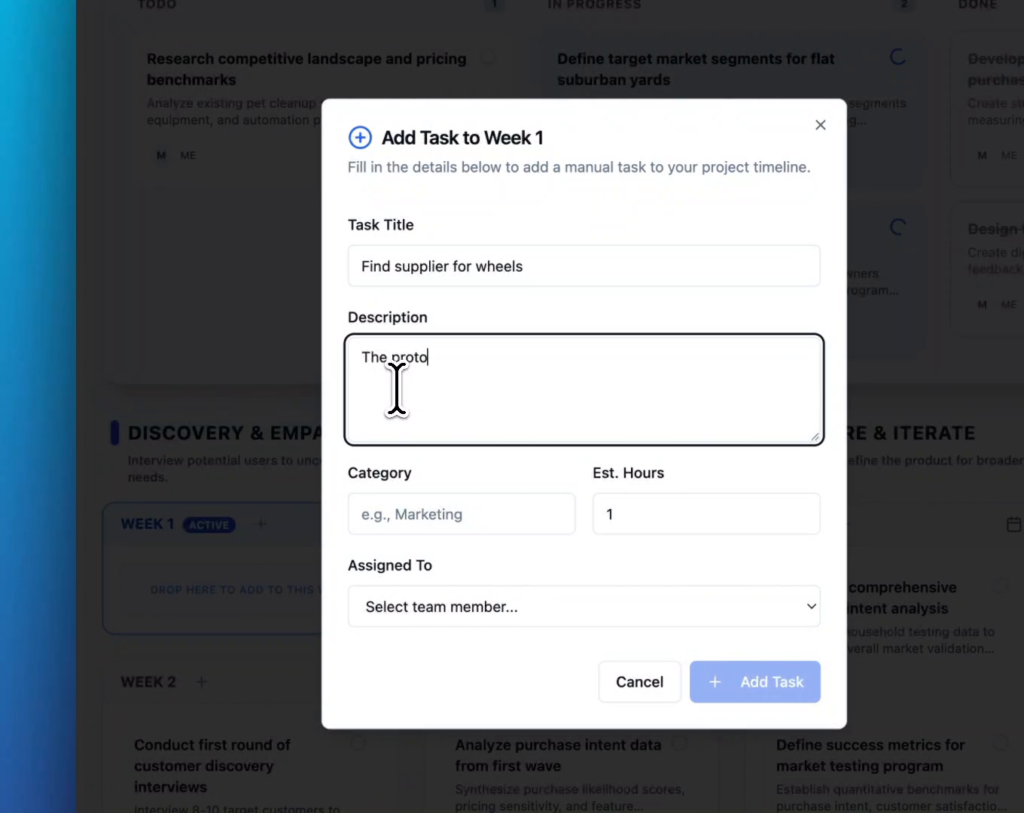
Task Title entered. The Description field is now active for further context.
Add a description
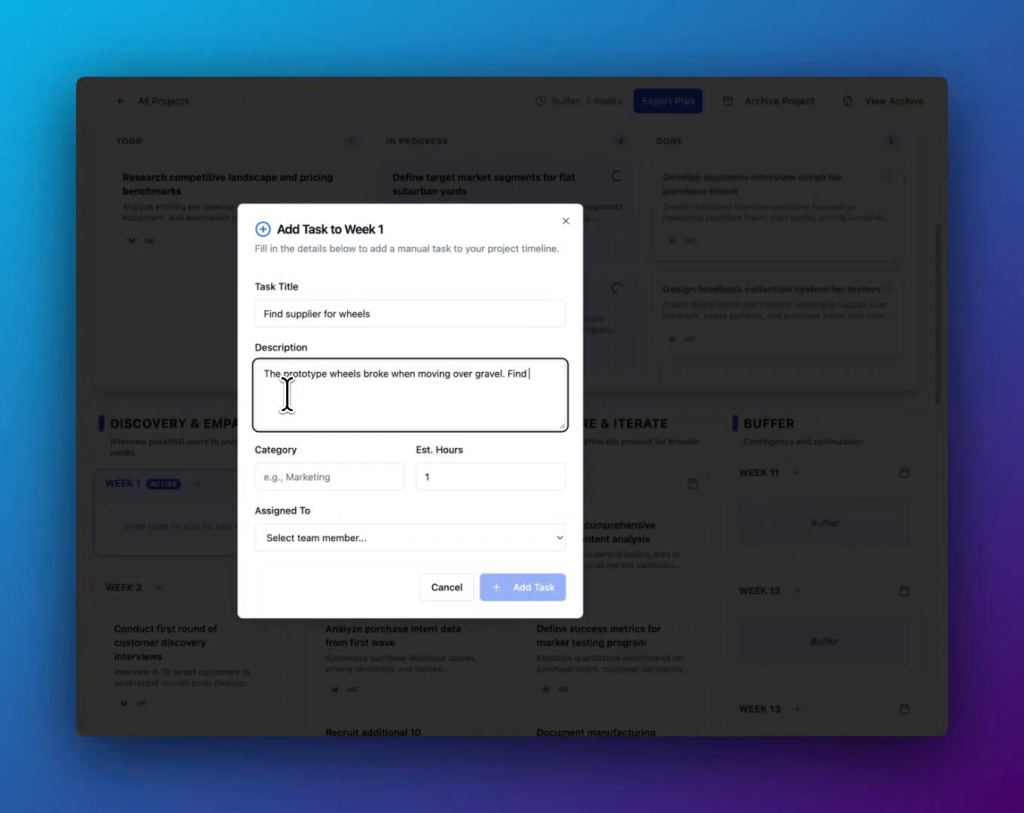
Click into the Description field and type a brief explanation of what needs to be done. A good description helps assignees understand the scope and any relevant context without needing to ask follow-up questions.
Example: “The prototype wheels broke when moving over gravel. Find 3 alternative suppliers and order samples.”
A clear description gives the assignee everything they need to get started.
Set the category and estimated hours
Fill in the two optional fields side by side:
| Field | Description | Example |
|---|---|---|
| Category | A label to group related tasks (e.g., by function or workstream). Free-text to type any value. | Prototype |
| Est. Hours | Your best estimate of how long the task will take, in hours. Defaults to 1. Use the up/down arrows or type a number. | 13 |
Assign the task
Click the Assigned To dropdown and select a team member from the list. If no one is assigned yet, you can leave this as Select team member… and assign it later by opening the task card.
Click “+ Add Task” to save
Once you are satisfied with the details, click the blue + Add Task button in the bottom-right corner of the panel. The panel closes and the new task card immediately appears in the plan under the selected week.
To discard without saving, click Cancel or the ✕ icon in the top-right of the modal.
Task Card Statuses
After creation, a task card starts in the Todo column. It can be moved through three statuses:
Work has not yet started. Default state for all new task cards.
Actively being worked on. Shown with a spinning progress indicator.
Completed. Card text is shown with a strikethrough in the Done column.
To move a card, drag and drop it between columns on the Current Week Focus board, or use the status control inside the card detail view.
FAQs
Yes. Click on any task card to open it and edit any of the fields such as title, description, category, estimated hours, or assignee.
Yes. Open the task card and edit the week assignment, or drag the card from one week row to another in the Plan view. You can also drag a card into the “Drop here to add to this week” drop zone in the active week.
There is no hard limit. However, using the Est. Hours field is a good practice to avoid over-committing a week’s capacity.
Any team member with edit access to the project can create task cards. View-only members can see cards but cannot add or modify them.